Pandan Crinkle Cookies

Pandan Crinkle Cookies

There’s something about the festive season that just screams cookies! From gingerbread and speculoos to shortbread and linzer cookies and everything in between. But one particular kind of festive cookie has always caught my eye, and yet I had never tried…

Crinkle cookies!

I wanted to do something different to chocolate or red velvet crinkle cookies that you often see this time of year and immediately thought of Pandan with it’s lovely green colour and soft floral taste.

Is Pandan really a Christmas flavour? I say why not?! The lovely green colour seems pretty festive to me. Here in Australia, tropical fruits like mango and passionfruit are just as much Christmas as cranberries and cherries. This beautiful South-East Asian ingredient is often described as “Asian vanilla”.

Pandan Crinkle Cookies

I like to keep some pandan leaves in the freezer to add when cooking rice or infusing into coconut cream, but in baking I prefer to use pandan extract. It’s the easiest way to get both colour and flavour into my dish. The extract is also easier to find than the fresh leaves. I have always been able to find it in my local Asian grocery.

In my research for the best way to make these cookies, there was several differing opinions. Some recipes needed an overnight rest in the fridge and others said to bake straight away. Some bloggers preferred to use vegetable oil instead of butter and many more still were just adapting a packet cake mix. We like to make things from scratch around here, so when I found Queen of Cookies Broma Bakery, I knew I could trust her! She definitely knows her stuff when it comes to all things cookie related.

Pandan Crinkle Cookies

It’s a really simple recipe that comes together super quickly for those #lastminutechristmas vibes. You could definitely get away with making a big batch of these on Christmas Eve! I really liked the double dip of caster sugar and THEN icing sugar which helped to get an extra snow-white crinkle appearance. You can’t really use too much icing sugar here! If you don’t use enough, it will dissolve into the cookie itself, so you want a thick, even layer to get those distinct beautiful crackles in the surface.

The original recipe says not to chill the dough but I found a short 10-15 minute rest in the fridge gave me the perfect size cookie that spread a little in the oven but not too much. However it is summer here, so room temperature is on the warm side right now. I would also reduce the oven temperature to 160°C and cook them for a few minutes longer to avoid the slight browning at the edges (which wouldn’t be noticeable on a chocolate cookie).

Pandan Crinkle Cookies

You may have figured out that I’m very into homemade Christmas gifts and cookies are just perfect for sharing. I also love the idea of sharing new flavours with your friends who may have never tried Pandan before! Served warm from the oven they were super gooey and soft, but got a nice chewy texture and slightly crisp exterior when cooled completely. The flavour was also more pronounced when the cookies had cooled.

For a special treat why not make my Pandan version AND Broma Bakery’s Red Velvet Crinkle Cookies? They would look so festive when stacked together or packaged in a tin, alternating green and red cookies!

Related Post: Candy Cane & Gingerbread Stuffed Cheesecake Cookies

Pandan Crinkle Cookies
5 from 2 votes
Print

Pandan Crinkle Cookies

Classic Christmas Cookies with a twist! These Pandan Crinkle Cookies use a delicious South-East Asian ingredient that has a floral taste and beautiful, festive green colour.

Course Cookies
Keyword Christmas, Cookies
Prep Time 20 minutes
Cook Time 10 minutes
Total Time 30 minutes

Ingredients

  • 112 g butter softened
  • 3/4 cup brown sugar
  • 1/2 cup caster sugar
  • 2 eggs
  • 2 teaspoons pandan extract
  • 1 teaspoon coconut extract
  • 2 1/3 cups plain all purpose flour
  • 1 1/2 teaspoons baking powder
  • 1/4 teaspoon salt
  • 1/2 cup caster sugar
  • 1/2 cup icing sugar powdered sugar/confectioner’s sugar

Instructions

  1. Preheat the oven to 160°C (320°F). Line 2 baking trays with non-stick baking paper.
  2. In a large bowl, cream together the butter, brown sugar and caster sugar until light and fluffy. Add the eggs one at a time, scraping down the bowl and beating well to fully combine.
  3. Add the pandan extract and coconut extract and mix to combine.
  4. Sift in the flour, baking powder and salt and then mix again until combined.
  5. Fill two smaller bowls with caster sugar in one and icing sugar in the other. Use an ice cream scoop or tablespoon to scoop cookie dough. Roll the balls in caster sugar first and then into the icing sugar to coat generously. You can’t really use too much icing sugar here. Place on the baking tray, leaving at least 3-4 cm gap between them for cookies to spread in the oven.
  6. Bake for 10-15 minutes until cookies have a crackled top but are still a little soft in the center. Allow to cool completely. Repeat with remaining mixture until all cookies are baked.

Fruit Mince Crumble Pies

The first time I made fruit mince pies was nine years ago. It’s amazing how this blog is kind of like the story book of my life over the last decade. I had forgotten that I made them at my Mum’s request (aka blatant hinting) and that the recipe had estimated a yield of 24 pies but ended up being closer to 60! That meant I had plenty to bring to the annual Sydney Food Bloggers Picnic, where I offered one to Denéa and she became one of my best friends to this day. The original recipe is still up in the archives! The photos are a little cringe-worthy, but the trip down memory lane was so worth it.

Before making them from scratch, I didn’t even like fruit mince pies. But that all changed when I stirred together dried fruit, spices and booze. I was surprised that I couldn’t keep my spoon out of the bowl! I ate one warm from the oven and never looked back.

This year, I think I have done even better! Everyone who has tried one so far has said they are the best fruit mince pies they have ever had – me included! They are much better than any store-bought version and I had so much fun making them.

Fruit Mince Crumble Pies

Now lets talk about the filling. I wanted to use the dried fruit that I already had on hand. I rummaged through the pantry and found sultanas, cranberries, dates and dried apricots. A good start. The thing I like about recipes like this is that you can definitely adapt it to use your favourite fruit or what you have in the cupboard. Dried cherries, figs or plums would be great too! As long as the combined total weight is about the same, you can use any ratio of fruit.

In addition to the usual spice suspects – cinnamon, vanilla and nutmeg – I also added Chinese five spice which contains star anise, cloves, fennel, pepper and yet more cinnamon. I also used freshly grated ginger for a zing that really worked nicely. Instead of dried mixed peel, I added fresh lemon zest.

I used my favourite vanilla pastry, which has never failed me for fruit pies and tarts. The biscuity texture was just perfect with these pies. If nothing else, save this post for the pastry recipe. It is a dream to work with – even for delicate lattice crusts. It comes together in minutes in the food processor and bakes up golden brown and beautiful every time.

Fruit Mince Crumble Pies

You can definitely make the fruit mince mixture a few days ahead and leave it in the fridge to infuse. But in keeping with the theme of Last Minute Christmas Recipes, I only let it sit for an hour, and it was still absolutely delicious. 

I feel like booze can make or break a Christmas dessert. I never liked the brandy-laden traditional Christmas fruitcake. I think the most important thing is to use what you like! In the original recipe I used port but this time I went with a nice spiced rum that I love to drink. You can also use whisky, dessert wine, stout or muscat. If you prefer not to use alcohol, you can use orange juice or even black tea!

You know how much I love a good crumble topping on cakes or pies and it’s no different here. I loved the hint of cinnamon and their slightly rustic appearance. I made them in a muffin tray and got nine extra large pies, piled high with fruit mince and crumble. Depending on the size of your tray you could get 12 or 24. They’re also delicious warm from the oven with a scoop of ice cream, or at room temperature. They would make seriously excellent homemade Christmas gifts!

Related Post: No Churn Christmas Pudding Bombe Alaska

Fruit Mince Crumble Pies

Fruit Mince Crumble Pies

These Fruit Mince Crumble Pies are filled with fruit, spices and booze with with a crunchy crumble topping. They are the best fruit mince pies I've ever made!

Course Dessert
Keyword Christmas, Pies & Tarts
Prep Time 1 hour
Cook Time 20 minutes
Resting Time 1 hour 30 minutes
Total Time 2 hours 50 minutes

Ingredients

Vanilla Pastry

  • 225 g plain flour
  • 60 g pure icing sugar, sifted
  • 112 g cold butter, coarsely chopped
  • 1/2 teaspoon vanilla bean paste or vanilla extract
  • 3-4 tablespoons iced water

Fruit Mince Filling

  • 200 g sultanas
  • 100 g dried cranberries
  • 80 g dates, de-seeded and chopped
  • 80 g dried apricots or peaches, finely chopped
  • 150 g brown sugar
  • 1 apple, grated
  • 1 teaspoon cinnamon
  • 1/4 teaspoon ground nutmeg
  • 1/4 teaspoon Chinese five spice (or mixed spice)
  • 1/2 teaspoon vanilla bean paste (or 1 teaspoon vanilla extract)
  • 1 teaspoon grated ginger, fresh
  • 1 teaspoon grated lemon zest
  • 50 g butter, melted
  • 30 ml spiced rum (see note)

Crumble Topping

  • ¼ cup sugar
  • ¼ cup brown sugar
  • 1/3 cup plain flour
  • 1 teaspoon ground cinnamon
  • 55 g butter, softened

Instructions

  1. To make the vanilla pastry, combine flour, icing sugar and a pinch of salt in a food processor. Add butter and pulse until mixture resembles breadcrumbs. Add 3-4 tablespoons iced water and vanilla extract and pulse until mixture just combines. Turn onto a lightly floured surface, form into a disc, wrap in plastic wrap and refrigerate for at least 30 minutes.
  2. To make the fruit mince filling mixture, place all ingredients into a bowl and mix well to fully combine. Set aside for at least 30 minutes to infuse. You can make this days ahead and keep covered in the fridge if you like!

  3. Roll out the pastry to about 3mm thick and cut out circles. I used 9cm circles for my large muffin tin. Repeat until you have used all the pastry. This pastry re-rolls very nicely. Just place it back in the fridge for a few minutes if it becomes too warm. Place the tray in the fridge until ready to use.
  4. Preheat the oven to 180°C (350°F). Divide the fruit mince mixture evenly between the pastry cases.
  5. To make the crumble, combine the sugar, brown sugar, flour, cinnamon and butter. Rub butter into the mixture with your fingertips. Spread evenly over top of the fruit mince pies.
  6. Bake for 15-20 minutes, rotating at the halfway point, until pastry and crumble are golden brown. Allow to cool completely in the tray and then remove. Store in an air-tight container for up to 1 week.

Recipe Notes

You can use whisky, dessert wine or muscat in place of rum. If you prefer not to use alcohol, you can use orange juice or black tea!

Almost No Bake Christmas Cheesecake with Biscoff Crust

Almost No Bake Christmas Cheesecake

I feel that the holiday season brings out two very different kinds of personalities. There are those who get right into the festivities, putting the decorations up really early, have Christmas music playing, shopping and wrapping done by early December and always have some kind of seasonal snack on hand.

Then there are the people who bemoan the presence of Christmas stuff in the shops in September, get their tree up the week before Christmas (if at all) and are shopping on Christmas Eve. And don’t even start with the Christmas music and movies! I’m usually the latter, but for some reason this year I’m kinda getting into the festive sprit! I’d love to know, which one are you??

Almost No Bake Christmas Cheesecake

Last minute Christmas peeps, I’ve totally got you. This festive cheesecake topped with raspberries and cherries is the perfect last minute dessert. It comes together so quickly and easily, with barely any baking. The crust only needs about 15 minutes in the oven and then the simple cheesecake filling just has to chill out in the fridge until you’re ready to serve. This is the kind of dessert you can make on Christmas Eve and still steal the show! 

Almost No Bake Christmas Cheesecake

The Biscoff crust is a revelation. Lotus Biscoff cookies and the much hyped cookie butter have become very popular lately. Cookie butter. Don’t those two words just make your mouth water?! It is super on trend right now thanks to Instagram. I’ve seen cookie butter used in all kinds of creative dessert recipes lately!

The spiced biscuits are like Dutch speculoos cookies, which are made around St Nicholas’ Day in early December. Traditional speculoos cookies contain a lot of the spices I’ve come to think of as festive like cinnamon, nutmeg, cloves, ginger and black pepper. I just knew the biscuits would make an excellent Christmas Cheesecake base.

Almost No Bake Christmas Cheesecake

The filling could not be simpler – I just mixed softened cream cheese with some cream and sour cream (you can also use creme fraiche), icing sugar and lots of vanilla. The sour cream cuts the richness and sweetness, which I really liked. There’s no eggs and no baking required! I refrigerated it for about 3 hours (really last minute here!) but chilling overnight would be better to ensure that the filling is nicely set and cuts into beautiful slices.

I topped this Christmas Cheesecake with some beautiful seasonal raspberries and cherries. A dusting of icing sugar made it look extra festive. There’s just something about cherries that screams celebration to me. If you’re in Aus like me, there are so many beautiful fruits in season right now. Mangoes, peaches, strawberries and blueberries, just to name a few, would all be delicious toppings. For my friends in the northern hemisphere, you could make a compote out of frozen berries that would taste delicious with this cheesecake!

Related Post: Gingerbread French Toast

Almost No Bake Christmas Cheesecake

Almost No Bake Christmas Cheesecake

This Almost No Bake Christmas Cheesecake topped with raspberries and cherries is the perfect last minute festive dessert.

Course Dessert
Keyword Christmas, Dessert, Summer
Prep Time 1 hour
Cook Time 15 minutes
Refrigerate 4 hours
Total Time 5 hours 15 minutes

Ingredients

Crust

  • 250 g Lotus Biscoff biscuits
  • 100 g butter, melted
  • 1 tablespoon raw sugar

Filling

  • 250 g cream cheese, softened
  • 200 ml sour cream or creme fraiche
  • 100 ml pouring cream
  • 40 g icing sugar, sifted
  • 1 teaspoon vanilla extract or 1/2 teaspoon vanilla bean paste

To serve

  • Fresh raspberries
  • Fresh cherries
  • Icing sugar, for dusting

Instructions

  1. Preheat the oven to 180°C (350°F).
  2. To make the crust, place the Biscoff cookies into a food processor and blitz until they form crumbs. Add the melted butter and sugar and blitz again until the mixture has the consistency of wet sand. Press into the bottom and sides of a 24cm/9 inch removable bottom tart tin, using the back of a spoon to press down evenly. You might have a little bit leftover.

  3. Bake crust for 10-15 minutes, until the crust looks just slightly darker in colour. Set aside to cool.
  4. To make the cheesecake filling, place the cream cheese, cream and sour cream into a large bowl. Beat with electric beaters (or stand mixeuntil smooth and creamy. Sift in the icing sugar and add the vanilla and mix again until well combined. Scrape down the sides of the bowl as necessary to ensure everything is well mixed.
  5. Dollop the cheesecake mixture into the cookie crust and place into the fridge for at least 3-4 hours but preferably overnight.
  6. When ready to serve, top with fresh raspberries and cherries and dust with icing sugar.

Pulled Pork Loaded Sweet Potatoes

Pulled Pork Loaded Sweet Potatoes

I’ve made pulled pork so many times that it has sort of become my signature dish. My friends and family love it and I get requests to make it for picnics and parties. When cooking for a crowd of people, y’all know I love my slow cooker. I wrote a whole blog post about all the many reasons why over here. I love that it takes a few minutes of prep and then you can set it to cook overnight or all day while you do other things. Also, as a bonus making it in the slow cooker or Instant Pot will free up your oven space to cook side dishes or desserts! 

I’ve done pulled pork dozens of different ways over the years. I’ve used a black vinegar and star anise based braising liquid for a Chinese style pork dish. I’ve made it heavy on the rosemary and wine for a ragu pasta sauce. I’m very partial to adding ginger beer, cola, or even a bottle of Corona in there – whatever I have in the fridge. My sister likes to make it with pear cider, which is also super yummy. It’s the perfect recipe to experiment with and almost impossible to muck up.

Pulled Pork Loaded Sweet Potatoes

I never measure any ingredients when I slow cook, and somehow it always turns out delicious. However this time I wrote everything down so I could share the recipe with you! You’re welcome 😉

Next time it will probably taste a little different, but that’s totally ok! Don’t worry too much because you will have an opportunity after it’s been cooking away for hours to taste and adjust the seasoning. After the meat is cooked and falling apart, I like to remove it and then reduce the liquid a little bit to intensify the flavours. You might need to add some salt or a little vinegar or sweetness. 

Once it’s shredded and added back into the liquid, it’s ready to go! Pulled pork is so delicious and versatile. You can make so many different dishes. I often freeze some in small containers, because you never know when it will come in handy.

Pulled Pork Loaded Sweet Potatoes

Some of my favourite ways to use pulled pork are… 

The recipe I’m sharing today is for Loaded Sweet Potatoes topped with pulled pork (of course), black beans, cheese and your favourite fresh toppings. I used cherry tomatoes, avocado, crunchy radish and coriander with a big dollop of yoghurt and a squeeze of fresh lime. Hot sauce is optional but highly recommended.

I love the idea of using sweet potatoes as the base for this dish because it’s a much healthier choice than nachos or fries but still packed with flavour. The flavour combination was super delicious. I could honestly eat this any night of the week!

Pulled Pork Loaded Sweet Potatoes

Pulled Pork Loaded Sweet Potatoes

These Pulled Pork Loaded Sweet Potatoes are a delicious simple lunch or dinner idea and a great way to use leftover pulled pork in a new and tasty way!

Course Dinner
Keyword Healthy Recipes, Simple Dinners
Prep Time 30 minutes
Cook Time 9 hours
Total Time 9 hours 30 minutes
Servings 4 people

Ingredients

Pulled Pork (you will have some leftover)

  • 1 tablespoon olive oil
  • 1 onion, finely chopped
  • 2-3 garlic cloves, finely chopped
  • 1 kg pork shoulder
  • 1 1/2 teaspoons cumin
  • 1 teaspoon paprika
  • 2 teaspoons jerk seasoning
  • 2 tablespoons Worcestershire sauce (or maple syrup also works)
  • 1/4 cup apple cider vinegar
  • 2 cups chicken stock
  • Salt and pepper

Loaded Sweet Potatoes

  • 2 small sweet potatoes, washed
  • 1 can black beans, rinsed
  • Mozzarella cheese
  • Cherry Tomatoes
  • 1 Avocado, thinly sliced
  • Radish
  • Fresh Coriander
  • Yoghurt or sour cream
  • Hot sauce
  • Lime Juice

Instructions

  1. I used a Multi Cooker similar to an Instant Pot to make my Pulled Pork. You can also make this in a stand alone slow cooker or the oven. If you don’t have one, just do the first step in a fry pan and transfer everything to your cooking vessel afterwards.
  2. To make the pulled pork, put the olive oil, onion and garlic into the bowl of your Multi Cooker on the Sauté setting or a frypan, until they start to soften. Add the pork and start to brown on all sides. Add the onion, garlic and pork to your preferred cooking vessel and then add the rest of the ingredients.

  3. Use the Slow Cook setting on the Multi Cooker for up to 9 hours. Or, if using the oven, cover tightly with foil and place into a very low oven (140°C / 285°F) for at least 4-5 hours or until the meat is falling apart.

  4. When the meat is cooked, I like to remove it from the pot and reduce the liquid down by at least 1 third in volume and keep tasting for seasoning. You may need to add salt, pepper and a little more vinegar. In the meantime, shred the pork with two forks and then return it to the cooking liquid. Keep it warm until ready to serve.
  5. To make the Loaded Sweet Potatoes, preheat the oven to 180°C (350°F). Pierce the sweet potatoes all over with a fork, place on a flat baking tray and roast for 1 hour.
  6. Carefully slice in half lengthwise and top each half generously with pulled pork, black beans and cheese. Season with salt and pepper. Bake for another 10 minutes or until the cheese has melted.
  7. Add your favourite fresh toppings – I like cherry tomatoes, avocado, radish and fresh coriander, but this is totally up to you. To serve, top with a dollop of yoghurt or sour cream, a squeeze of lime and hot sauce, if you like it spicy!

Lavender Lemonade

Lavender Lemonade

I have been wanting to share this recipe for Lavender Lemonade with you guys for such a long time! I made it earlier this year but I didn’t manage to take any photos – disaster! It’s the perfect drink for spring, so the timing worked out perfectly. It is a super lovely mocktail – floral, sweet and tart… but it is also very delicious with a shot of gin or vodka, if you’re so inclined! 

Although edible flowers have been all the rage for the last few years, lavender is the OG. I won’t lie, I do love edible flowers – big fan of violet and chamomile. Lavender has been used for cooking, bathing, herbal medicine and aromatherapy for over 2500 years! It is said to help with insomnia, and pain relief. I’m personally interested in lavender’s effect on anxiety and promoting a sense of relaxation and calm!

Lavender Lemonade

I used to really dislike the smell of lavender. It just reminded me of old lady perfume and was often really overpowering. It took me a few years of baking with it to really appreciate it, and learn that a little goes a looooong way. Now I love the floral taste, and diffusing lavender essential oil at night puts me straight to sleep.

Culinary lavender can be used in so many ways – to infuse sugar, milk or cream for cakes, ice creams and panna cotta. If you want to mix it into a batter or dough, it can also be ground. I have a great roundup of ideas here on this post.

Lavender Lemonade

You should be able to find culinary grade lavender at gourmet food shops or tea and spice shops, or online. It also goes great with flavours like lemon, honey or herbs like rosemary, thyme and oregano in a blend called Herbes de Provence.

But let’s get back to my Lavender Lemonade. I made a lavender infused simple syrup, which turned a beautiful natural purple-blush colour. It’s so pretty. What is a simple syrup, you ask? A 1:1 ratio of sugar and water, heated until the sugar dissolves and the syrup has slightly thickened. You can infuse the syrup with anything you like – in this case lavender – and then strain out the blossoms.

Lavender Lemonade

The simple syrup is combined with freshly squeezed lemon juice and topped up with soda water (also homemade in our new Soda Stream!). This is such a lovely refreshing and calming drink. It is just perfect for the warmer weather. My housemate K has become a huge fan! We always have lemons in the fruit bowl and the syrup lasts for weeks in the fridge, so this drink is easy to throw together. I have already had requests to make a second batch of lavender syrup. This will definitely be our fave spring drink!

The recipe below makes 2 servings but you can easily double it to serve in a pitcher for a crowd. It would be perfect for any kind of spring or summer gathering (with or without booze!).

Related Post: Boozy Lemonade

Lavender Lemonade

Lavender Lemonade

Lavender Lemonade is the perfect drink for any spring party! A homemade lavender simple syrup is delicious and refreshing with fresh lemon juice and soda.

Course Drinks
Keyword Cocktails, Drinks, Spring
Prep Time 15 minutes
Total Time 15 minutes
Servings 2 people

Ingredients

Lavender Simple Syrup

  • 1 cup sugar
  • 1 cup water
  • 2-3 tablespoons culinary grade lavender

Lavender Lemonade

  • 4 lemons, juiced
  • 1 shot gin or vodka, optional
  • Sparkling water
  • Ice Cubes
  • Lemon slices, to serve

Instructions

  1. To make the simple syrup, place sugar, water and lavender into a saucepan and place over medium heat. Stir until sugar is dissolved. Lower the heat and boil until slightly thickened and syrupy. Cool to room temperature, which allows the lavender to infuse into the syrup. Strain out the lavender and store in an airtight bottle. You can make this in advance and keep it in the fridge.
  2. To make the lavender lemonade, add the squeezed lemon juice to a tall glass. Add the gin or vodka (if using) plus lavender simple syrup to taste then top up with ice cubes and sparkling water. Garnish with lemon slice.

Dutch Baby Pancake with Chamomile Infused Honey

Dutch Baby Pancake with Chamomile Infused Honey

I’m a big fan of easy, portable breakfast ideas that you can prep ahead of time and take on the go. I run my own business, and most days are busy. I’m either running out to a photo shoot, eating at my desk or skipping breakfast entirely. That’s why I love a weekend brunch – the chance to take things more slowly in the morning. It feels like a special occasion, rather than just a normal day.

Dutch Baby Pancake with Chamomile Infused Honey

Whether I am meeting friends at a cute café or drinking my first cup of coffee while whisking pancake batter, it’s always something I appreciate. Add a chill Spotify playlist or an inspiring podcast in the background and you have lazy morning perfection.

I love a Dutch Baby Pancake, because it couldn’t be simpler to make!

Dutch Baby Pancake with Chamomile Infused Honey

You’ve probably got all the ingredients in your fridge and pantry already! You can either whisk all the ingredients together or throw them into the blender. Instead of frying up pancakes one by one, the mixture is baked until it’s golden brown and puffs up dramatically in the oven. Remember, my coffee hasn’t kicked in yet so pancakes with half the effort are all good in my book! The only really important thing is to have a cast iron skillet or a good pan that can go from stove to oven.

Dutch Baby Pancake with Chamomile Infused Honey

In the past I’ve made a version with Chai Poached Pears and Caramel, which has more autumn or winter vibes. But I wanted to mention it here since I know many of my readers are in the northern hemisphere. This might be exactly what you’re craving right now!

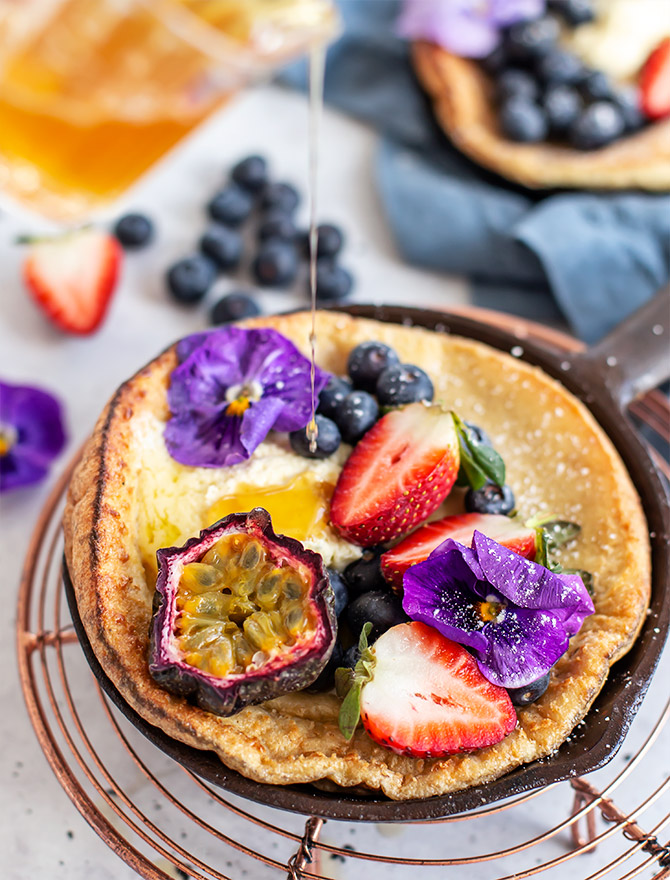
I like to think of one this as my spring edition of the Dutch Baby Pancake. It’s topped with new season berries, delicious fresh passionfruit and edible flowers, just because they’re super pretty. There’s also a big dollop of whipped mascarpone cream and a chamomile infused honey syrup generously drizzled over top. The sweetness and subtle floral taste complements the flavours perfectly.

Dutch Baby Pancake with Chamomile Infused Honey

I made two smaller Dutch Babies in individual skillets but you could of course use a regular 10 inch (25cm) large one. Just keep an eye of it and add a few extra minutes to the baking time if needed. You will know when it’s ready because it turns golden brown and the sides puff up beautifully in the oven! It’s truly a sight to behold. You’ll want to serve it quickly for the full impact.

I loved the original recipe from A Beautiful Mess and kept the recipe virtually the same as I made before. This time I used 3 eggs instead of 4 and almond milk instead of regular. You can also substitute a gluten free or whole-wheat flour.

Dutch Baby Pancake with Chamomile Infused Honey

Of course, once you’ve got the Dutch Baby Pancake recipe down (it’s super easy) you can use any fruit on top. If you like, you could even cook the berries into the pancake itself for double whammy jammy berry goodness! Thinly sliced apples, pears or peaches would work too. Ooh I’m giving myself ideas for next time!

Related Post: Raspberry & Ricotta Baked French Toast

Dutch Baby Pancake with Chamomile Infused Honey

Dutch Baby Pancake with Chamomile Infused Honey

A Dutch Baby Pancake is the perfect recipe for weekend brunch at home – it comes together easily and quickly, cooking in the oven instead of standing at the stove flipping pancakes!

Prep Time 20 minutes
Cook Time 15 minutes
Total Time 35 minutes

Ingredients

Chamomile Infused Honey

  • 3/4 cup honey
  • 1/4 cup fresh or dried chamomile flowers, or 1 chamomile tea bag

Dutch Baby Pancake

  • 2 tablespoons butter
  • 3 eggs
  • 1 tablespoon sugar
  • 1/2 teaspoon salt
  • 2/3 cup plain flour
  • 2/3 cup almond milk

Whipped Mascarpone

  • 150 g mascarpone cream
  • 1 teaspoon vanilla extract or 1/2 teaspoon vanilla bean paste
  • 1 tablespoon chamomile-infused honey

Toppings

  • Strawberries, sliced
  • Blueberries
  • Passionfruit, halved
  • Edible flowers, optional

Instructions

  1. To make the chamomile infused honey syrup, heat the honey in a small saucepan until small bubbles form and add the flowers or tea. Allow to steep for 5-10 minutes.
  2. To make the dutch baby pancakes, preheat your oven to 180°C (350°F). Place a tablespoon of butter into two small cast iron skillets (or other oven safe panand place them in the oven while it heats up, melting the butter.
  3. Meanwhile, in a bowl, combine the eggs and milk, whisk to combine. Add in the other ingredients and stir until no lumps remain in the batter. Once your oven is preheated remove the hot pans and give them a shake to evenly distribute the butter (if needed). Divide the batter in half and pour into each pan. Bake for 12-15 minutes.
  4. To make the whipped mascarpone, whisk together the mascarpone, vanilla and honey (to tastin a small bowl until soft peaks form.
  5. Serve with the dutch baby pancakes with strawberries, blueberries, passionfruit, a dollop of whipped mascarpone, edible flowers (optionaand a drizzle of chamomile honey syrup.

Strawberry and Thyme Galette Tart

Strawberry and Thyme Galette Tart

They say September is the new January and I’d have to agree. Here in the southern hemisphere, we’re going into spring not fall, and our “back to school” happens in February… but I definitely feel a rush of inspiration and motivation at this time of year. The longer days seem filled with potential for a fresh start after a long winter. The first warm days after winter put me in such a great mood.

I’m on the lookout for jacaranda flowers and the first whiff of jasmine in the air. I love seeing the first berries and peaches of the season, and the tiny little buds on our hydrangeas. I want to go out and buy myself a bunch of flowers, just because. We made it through another winter, that’s reason enough for me!

Strawberry and Thyme Galette Tart

I know it’s still early in the season but I’ve been buying strawberries for a few weeks now and they’re absolutely beautiful. Plump, sweet and bursting with flavour. I’ve put them on top of my oatmeal, into smoothies, and snacked on them just as they are. I wanted to make a dessert with them as soon as possible – something that really allowed them to shine.

This Strawberry and Thyme Galette is the best way to use all those spring strawberries!

Strawberry and Thyme Galette Tart

I’ve been pairing fruit and herbs for years and there’s something special about the combination of strawberries and thyme. It may sound unusual but the flavours really work. I feel like it might just be my next homemade jam flavour too – stay tuned!

And for something a little different, a little freshly ground pink peppercorn in the mix too. The flavour is warm, tangy and has a slight touch of sweetness and fruitiness. If you can’t find it, don’t worry, I’ve written it as optional in the recipe below. You can use another flavouring – maybe lavender or rose, or just let the strawberries and thyme have their moment in the spotlight.

Strawberry and Thyme Galette Tart

Don’t worry about pie tins or lattice patterns – this simple galette is very rustic, but I think it’s beautiful. It’s the easiest kind of pie or tart you can make. Especially with a few extra thyme leaves on top and a big scoop of vanilla bean ice cream. That’s a non-negotiable here. I love ANY warm fruit dessert with ice cream.

It all comes together super easily! The pastry is easy to make in a food processor and can be made a day or two in advance. Then there’s just a little stirring, rolling, folding, brushing and baking. Go and read the recipe below for the full details, but what I’m saying is that it’s pretty darn simple.

Strawberry and Thyme Galette Tart

You’ll know it’s ready when your kitchen smells amazing, the pastry is golden brown and the strawberries are juicy and bubbling.

If you make this Strawberry and Thyme Galette, be sure give this recipe a rating and tag me on Instagram. I love seeing when you guys try my recipes, it seriously makes my day!

Related Post: Fig Crumble Tart with Honey Whipped Ricotta

Strawberry and Thyme Galette Tart

Strawberry and Thyme Galette Tart

A super easy and delicious dessert to showcase beautiful spring strawberries – Strawberry and Thyme Galette Tart! Don't forget the ice cream.

Course Dessert
Keyword Pies & Tarts, Spring, Summer
Prep Time 20 minutes
Cook Time 30 minutes
Resting time 20 minutes
Total Time 1 hour 10 minutes
Servings 6 people

Ingredients

Pastry

  • 2 cups plain (all purpose) flour
  • 3 teaspoons caster sugar
  • 150 g unsalted butter, cold
  • 4 tablespoons iced water

Filling

  • 400 g strawberries, sliced (I did a mixture of quartered and sliced horizontally)
  • 2 tablespoons cornflour
  • 2 tablespoons honey
  • 1/4 teaspoon pink peppercorns, crushed (optional)
  • 1-2 teaspoons fresh thyme leaves, picked
  • 1 vanilla bean, seeds scraped or 1 teaspoon vanilla bean paste
  • 1 egg, lightly beaten
  • Raw sugar, for scattering
  • Icing sugar and vanilla ice cream, to serve
  • Extra fresh thyme, to serve

Instructions

  1. To make the pastry, place flour, caster sugar and butter in the bowl of a food processor and pulse until the mixture resembles coarse breadcrumbs. With the motor running, add the iced water and process until the mixture starts to form a dough. Knead lightly on a floured work surface until dough just holds together. Flatten into a disc and wrap plastic wrap. Refrigerate for 20 minutes.

  2. Preheat your oven to 180°C (350°F).
  3. In a large bowl, place the sliced strawberries, cornflour, vanilla, thyme, pepper (if usinand honey and stir to combine.
  4. Roll out the pastry to 3mm thick round shape. Spoon the strawberries into an even layer, leaving around 8cm border around the outside of all sides. Fold in the sides of the pastry, brush with egg and scatter raw sugar. Bake for 20-30 minutes until pastry is golden and strawberries are bubbling.

  5. Serve in thick slices dusted with icing sugar, extra thyme leaves and big scoops of vanilla ice cream.

Beetroot Hummus with Homemade Seeded Crackers

Beetroot Hummus with Homemade Seeded Crackers

If there’s two things I know I will always have the ingredients on hand to make, it’s spaghetti cacio e pepe, which is my #1 comfort food dish… and hummus. It’s incredible to me the way that a handful of basic ingredients can come together to create magic – butter, sugar, eggs and flour and hey, you have cake. Or in this case a few things thrown into the food processor can create a dreamy dip.

A can of chickpeas. Lemon. Garlic. Olive oil. Tahini. Salt. That’s literally it. We always have these ingredients on hand. If you’ve never tried making hummus at home, it’s sooo different to it’s store-bought counterpart – and in my opionion, way better. I don’t think I can ever go back to buying it from the supermarket!

Beetroot Hummus with Homemade Seeded Crackers

Tahini is a sesame seed paste that you can buy at any supermarket now. It has become a staple in recent years and we always have it in the pantry. I will often use it in salad dressings and this spicy pork noodle dish is one of our favourites. I made it a few days ago! Tahini is even a popular ingredient to add to desserts like brownies or cookies as a nut-free substitute for peanut butter. 

Today I am adding one more ingredient to my hummus recipe. I think you can tell just by looking at the photos.

Beetroot!

I found in-season beetroot at the markets for 99c a kilo so you bet I had to pick some up. I just roasted it with some olive oil and then cooled it before adding it to my hummus. You can also pick up pre-cooked peeled beetroot at the supermarket these days which is a massive time saver. 

And what to eat with our beautiful homemade hummus? The options are endless. You can use it as a bed for slow cooked lamb as I’ve done before. Perhaps in a nourish bowl like the photo above. Hummus is a great base for your favourite roasted vegetables, source of protein (chicken or haloumi are delicious) and sauteed kale. You could even throw a poached egg on top and have a fancy cafe-style breakfast!

Or, since you’re already making things from scratch, you could try homemade seeded crackers too! I’ve experimented with a few cracker recipes over the years with varying levels of success. I like a crunchy, rustic cracker that you can crack apart into irregular shapes. This recipe came from Real Food Projects and was incredibly easy to make. The basic recipe is four ingredients and a rolling pin.

Beetroot Hummus with Homemade Seeded Crackers

It’s impossible to overwork the dough and they were surprisingly quick and easy to make. The recipe produced a crisp, paper thin cracker, which is great but I think next time I will actually roll them a little thicker so they are better for dipping.

When you make things yourself, you can experiment and customise, which is definitely my favourite part. Try different brands of tahini in your hummus until you find one that is perfect. Change the texture by adding more or less of the reserved chickpea water or lemon juice.

Maybe try using different flours in the homemade crackers (a whole wheat or rye flour would be fantastic) and you can add any toppings you like! I used white and black sesame seeds and fennel seeds, but you could also use any kind of salt, poppy seeds, dried herbs, spices (give them a quick roast in a frying pan for extra flavour!) or even a sprinkling of grated cheese. Delicious!

Beetroot Hummus with Homemade Seeded Crackers

Beetroot Hummus with Homemade Seeded Crackers

This delicious snack is so easy to make from scratch with ingredients you probably already have in your pantry – Beetroot Hummus with Homemade Seeded Crackers.

Course Snack
Keyword Healthy Recipes, Snack
Prep Time 1 hour
Cook Time 30 minutes
Total Time 1 hour 30 minutes
Servings 10

Ingredients

Beetroot Hummus

  • 300 g beetroot, roasted and cooled
  • 2 cans chickpeas
  • 1-2 cloves garlic
  • 2 tablespoons tahini
  • 2 tablespoons olive oil
  • Juice of 2 lemons
  • Salt, to taste

Homemade Seeded Crackers

  • 150 g plain flour
  • 2 tablespoons olive oil, plus extra for brushing
  • 60 ml 1/4 cup water
  • 1 tablespoon sea salt
  • 2 tablespoons sesame seeds (I used a combination of white and black)
  • 1 teaspoon fennel seeds

Instructions

  1. To make the hummus, drain the chickpeas and reserve the liquid. This is called Aquafaba and can be used for many other recipes or as a vegan egg white substitute!
  2. Add the beetroots to a food processor and blitz until it starts to break down into smaller pieces. Add the chickpeas, garlic, tahini, olive oil and lemon juice to the food processor and blitz again. Scrape down the sides, add a little salt and 2 tablespoons of reserved aquafaba.
  3. Blitz again until the hummus starts to turn smooth. Taste for seasoning and add a little more salt or lemon juice if you like. I added about 5 tablespoons of aquafaba to reach the thick consistency that I wanted, but keep adding a little at a time and blitz until you are happy with the consistency and texture. Serve with homemade crackers.
  4. To make the crackers, preheat the oven to 200°C (400°F).
  5. Combine the flour, olive oil, water and salt in a large mixing bowl and stir to combine. The mixture should be a little sticky. Add extra water 1 tablespoon at a time if your mixture is looking too dry.
  6. Tip the dough out onto a floured work bench and knead for about 1 minute. It should have a soft texture. Cut the dough into 8 equal pieces and roll out with a rolling pin into a long oblong shape. It’s ok if they aren’t perfectly shaped – rustic is the name of the game! You can roll them paper thin for a super crisp cracker, or a little more thickly for a cracker with some crunch.
  7. Sprinkle each piece of dough evenly with your chosen toppings and gently roll your rolling pin over the top to make sure they stick to the dough. Transfer to baking trays lined with non-stick baking paper and prick all over with a fork. Optionally, brush with a little extra olive oil or butter.
  8. Bake for 6-8 minutes or until they are golden. Cool on a wire rack and then crack into irregular size pieces. These crackers will keep for up to 2 weeks stored in an air-tight container.

Pear and Pistachio Crumble with White Chocolate

Pear and Pistachio Crumble with White Chocolate

I’ve made a lot of desserts over the years – from simple to more technical and complex. Many of them you can see over in my recipe index. But there are a couple of dishes that I seem to make over and over because I love them so much. In winter, I can’t get enough sticky date pudding, self-saucing pudding and fruit crumble.

But of course, I’m always on a mission to make them different (and better) every time. This Pear and Pistachio Crumble is totally one of the best crumbles I’ve ever made. I love crumbles because they are super versatile. You can use just about any fruit from berries, rhubarb, stone fruit, apples, pears etc. You can adapt the topping to use different nuts or flours, and easily create gluten free and vegan versions of it to satisfy everyone’s dietary needs.

Pear and Pistachio Crumble with White Chocolate

Call it a weird food quirk, but I really don’t like raw pear. I would never go and pick one up from the fruit bowl and take a bite. They always seem to be underripe and rock hard or overripe and mushy. However, they are one of my absolute favourite ingredients for winter baking.

I love cooking pears because it doesn’t seem to matter if they aren’t perfectly ripe. When they are baked or poached they soften up beautifully and take on whatever flavour they are cooked with.

Pear and Pistachio Crumble with White Chocolate

Pears pair (haha) with so many different ingredients in a million different ways. Think classic combos like warm spices, nuts, caramel, tea, honey and other fruits like apple, berries and rhubarb… to more unexpected flavour pairings like chocolate, red wine, even cheese! 

This Pear and Pistachio Crumble is absolutely something special. I love the in-season fruit cooked with dessert wine and a hint of cardamom and rosewater. The crumble topping is perfectly buttery and crisp with the addition of pistachios and coconut. Plus, it’s easy, which is a big tick in my book!

Pear and Pistachio Crumble with White Chocolate

But my favourite part is the white chocolate! I was had originally planned to use dark chocolate but I didn’t have any in the cupboard and decided to try it with white chocolate instead. I didn’t want it to burn while baking, so I pressed squares of the chocolate into the crumble as soon as it came out of the oven. The residual heat melted the chocolate, creating pockets of delicious creamy sweetness.

Served with a big scoop of vanilla bean ice cream and a scattering of dried rose petals, this has to be one of my favourite desserts I’ve created recently. I just loved everything about it and couldn’t wait to share the recipe with you!

Related Post: Berry, Coconut & Quinoa Crumble

Pear and Pistachio Crumble with White Chocolate

Pear and Pistachio Crumble with White Chocolate

This Pear and Pistachio Crumble is a delicious winter dessert, with a hint of rosewater and creamy pockets of melted white chocolate.

Course Dessert
Keyword Autumn, Dessert, Winter
Prep Time 15 minutes
Cook Time 55 minutes
Total Time 1 hour 10 minutes
Servings 4 servings

Ingredients

  • 4 pears
  • 1/3 cup dessert wine
  • 1/3 cup water
  • 1/2 vanilla bean, seeds scraped (or 1/2 teaspoon vanilla bean extract)
  • 10 cardamom pods
  • 2 tablespoons raw sugar
  • 1-2 teaspoons rosewater
  • Dried rose petals, optional
  • Vanilla ice cream, to serve

Crumble

  • 60 g butter, slightly softened, cut into cubes
  • 3 tablespoons plain flour
  • 2 tablespoons brown sugar
  • 1/4 cup pistachios, roughly chopped
  • 1/4 cup shredded coconut
  • Pinch Salt
  • 6 squares white chocolate

Instructions

  1. Preheat the oven to 180°C (350°F).
  2. Peel and core the pears and cut into roughly 3cm cubes. Place into a saucepan with the dessert wine, water, vanilla, cardamom pods and raw sugar. Cook, stirring often for about 20 minutes or until pears are cooked. Remove from the heat and add the rosewater. Remove the cardamom pods and set aside.
  3. To make the crumble, place the butter, flour, brown sugar, chopped pistachios, coconut and a pinch of salt into a bowl. Rub the mixture with your fingers until the butter has been incorporated and it forms a crumbly texture.
  4. Place the pears into a baking dish and scatter the crumble mixture over the top. Bake for 20-30 minutes, until the topping is golden. Remove from the oven and lightly press the squares of white chocolate into the warm crumble topping. Serve warm with vanilla ice cream.

7 Days of Cozy Simple Dinners

Roasted Vegetable Salad

I am a girl with a massive sweet tooth, but one cannot live on desserts alone. That’s why I started my Simple Dinners column – sharing some of my favourite savoury dishes too!

Yes I love cooking, but I often struggle with what to make for dinner and being organised with meal planning and groceries. I often feel like I’m on a Masterchef mystery box challenge, trying to make something tasty with whatever I have on hand with the ingredients in my fridge and pantry!

I’ve put together a week’s worth of delicious (and yes, simple) dinners that are perfect for cold evenings and easy enough to tackle on a weeknight. I think winter is a great time to get cozy and try something new. If you try any of these, tag me on Instagram and let me know!

Pumpkin Cauliflower Mac and Cheese

Day 1 – Pumpkin Cauliflower Mac and Cheese

I am a total mac and cheese lover. If I see it on any restaurant sides menu, there is a 100% chance of me ordering it. I’m even partial to a packet version every once in a while, but this is my healthier take on this comforting classic. I swapped out some of the macaroni for cauliflower florets and made a really yummy pumpkin béchamel sauce.

This is a dish that grownups and kids can both enjoy. I love the rosemary breadcrumbs for some crunch on top, but it has 2 sneaky servings of veggies hidden inside. You can serve it as a meat free main meal or as a side dish to any kind of protein.

One Pot Moroccan Chicken

Day 2 – One Pot Moroccan Chicken

I love a one pot meal with minimal washing up! This dish looks fancy and dinner party worthy, but it’s actually super easy for weeknights. If you have the time, you can marinate the chicken in the spice paste for a few hours or overnight, but I usually forget to do this and it still tastes amazing.

This Moroccan chicken packs a huge flavour punch with fresh and preserved lemons, olives, spices and herbs. I like to serve it family style in the same pot it was cooked in with a scattering of fresh herbs, a green salad on the side and everyone can help themselves.

Ottolenghi Spinach, Ricotta and Fetta Pie

Day 3 – Ottolenghi’s Spinach and Herb Pie

Don’t let all the beautiful greens you bought at the farmers market on the weekend go to waste! I like that this recipe can be easily adapted – use whatever greens (silverbeet, baby spinach, kale, chard, etc) and cheeses (ricotta, fetta, goats cheese, cheddar, parmesan, etc) that you have on hand.

The flaky filo pastry really makes this dish for me. This pie is a great way to use up the various half bunches of herbs sitting in the fridge. Food waste is such a big issue for the environment so click through to the original post for some great ideas on how to use up leftover herbs.

Spicy Pork and Tahini Noodles

Day 4 – Spicy Pork and Tahini Noodles

I just had to include this recipe because my housemate and I make this dish more than anything else. It’s one of our weeknight staples for any time of year and we always keep the main ingredients on hand in case the craving strikes.

This dish comes together so quickly and easily. The flavours of pork, tahini, Szechuan peppercorns and chilli are balanced out by the acidity of the fish sauce and lime juice. And of course there are loads of herbs, spring onions and grated cucumber to give it freshness.

Roasted Vegetable Salad

Day 5 – Roasted Vegetable Salad with Quinoa

I often make this kind of dinner on nights I’m home alone and just cooking for myself. In winter, like making big batches of roasted vegetables every few days and using them in different dishes to make a bunch of quick and easy meals – including this salad!

The turmeric and tahini dressing makes anything it goes on delicious. This hearty salad can be served as a satisfying main meal or a great side dish to grilled chicken, fish or lamb.

Pumpkin Turmeric Soup

Day 6 – Pumpkin & Turmeric Soup

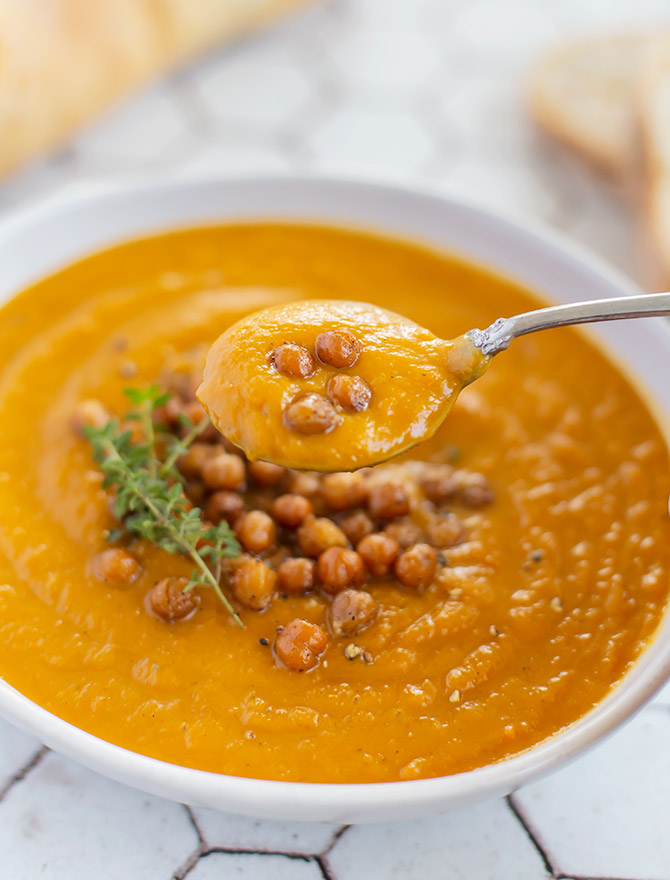
Why yes, I did post a pumpkin soup earlier this month but this one is from the archives and still a good-for-you favourite. I make this all the time when I get a cold or feel one coming on. I love the addition of turmeric, ginger and honey to this soup for an immunity boosting kick.

Creamy Chicken Pesto with Roasted Cherry Tomatoes

Day 7 – Creamy Chicken Pesto with Roasted Cherry Tomatoes

Sometimes, a girl just needs a big bowl of pasta, am I right? I’ve been making this dish for more than a decade, so I know it’s good. The pesto sauce comes together in the time it takes to cook your pasta, so this is one of my absolute favourite quick and easy meals.

PS – If you don’t have time to roast tomatoes or they aren’t in season, you can use sun-dried tomatoes or just omit them.

Chocolate Whisky Pudding with Passionfruit Ice Cream

Bonus Dessert! Chocolate Whisky Pudding with Passionfruit Ice Cream

Puddings are my favourite comfort food and this one is no exception. If you’ve got the oven on, it just makes sense to make dessert as well! Self-saucing puddings are a little bit magical – the boiling liquid that goes on top somehow becomes the rich sauce under a layer of cake-like pudding.

This recipe has a good hit of whisky and a homemade passionfruit ice cream but you can use your favourite – anything that goes well with chocolate would be perfect here!